In order to change the pattern recognized in simpleTest you need to modify your code and create a new template file.
You can modify the simpleTest.c file by changing the loaded filename:
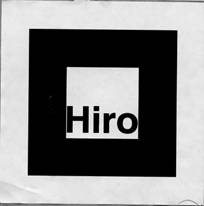
char *patt_name = "Data/patt.hiro";
with
char *patt_name = "Data/patt.yourpatt";
The program to create your new template file is called mk_patt and is contained in the bin directory. The source code for mk_patt is in the mk_patt.c file in the util directory.
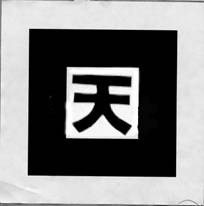
To create a new template pattern, first print out the file blankPatt.gif found in the patterns directory. This is just a black square with an empty white square in the middle. Then create a black and white or color image of the desired pattern that fits in the middle of this square and print it out. The best patterns are those that are asymmetric and do not have fine detail on them. Figure 1 shows some possible sample patterns. Attach the new pattern to the center of the blank square.
 |
 |
Once the new pattern has been made, change to the bin directory and run the mk_patt program (in console mode only). You will be prompted to enter a camera parameter filename. Enter the filename camera_para.dat. This is the default camera parameter file.
ARToolKit2.32/bin/mk_patt
Enter camera parameter filename: camera_para.dat
The program will then open up a video window as shown in Figure 2.
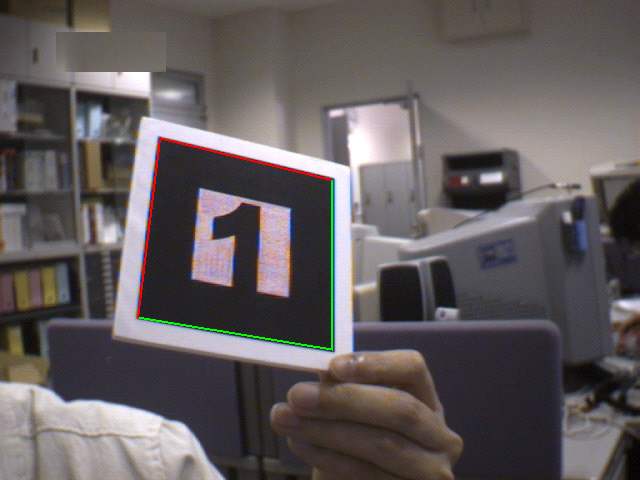
Figure 2: mk_patt Video Window
Place the pattern to be trained on a flat surface in similar lighting conditions as will exist when the recognition application will be running. Then hold the video camera above the pattern, pointing directly down at the pattern, and turn it until a red and green square appears around the pattern (figure 7). This indicates that the mk_patt software has found the square around the test pattern. The camera should be rotated until the red corner of the highlighted square is the top left hand corner of the square in the video image, as shown in Figure 7. Once the square has been found and oriented correctly hit the left mouse button. You will then be prompted for a pattern filename. Enter for example patt.yourpatt.
Once a filename has been entered a bitmap image of the pattern is created and copied into this file. This is then used for the ARToolKit pattern matching. In order to use the new pattern files they need to be copied to the bin/Data directory. You can recompile simpleTest and now use your own pattern!
Once one pattern has been trained, others can be trained simply by pointing the camera at new patterns and repeating the process, or the right mouse button can be hit to quit the application.
The main differences with the simple program are:
- loading of a file with the declaration of multiple pattern.
- a new structure associate to the patterns that imply a different checking code and transformation call in your program.
- a redefinition of the syntax and the definition of the draw function.
For loading multiple patterns in ARToolKit a specific function is proposed on object.c name read_ObjData. With this function the loading of the marker is now done with:
if( (object=read_ObjData(model_name, &objectnum)) == NULL ) exit(0);
printf("Objectfile num = %d\n", objectnum);
object is a pointer to an ObjectData_T structure, a specific structure to manage a list of patterns. the model_name defined now not a pattern definition filename (here with the value Data/object_data), but a specific multiple pattern definition filename (WARNING: this format is different of a multiple pattern tracking filename !!!). The text file object_data specifies which marker objects are to be recognized and the patterns associated with each object. The object_data file begins with the number of objects to be specified and then a text data structure for each object. Each of the markers in the object_data file are specified by the following structure:
- Name
- Pattern Recognition File Name
- Width of tracking marker
- Center of tracking marker
#pattern 1
cone
Data/patt.hiro
80.0
0.0 0.0
Note that lines beginning with a # character are comment lines and are ignored by the file reader.
ARToolKit can now try to identify multiple patterns in the arDetectMarker routine. Since we now detect multiple markers, we need to maintain a visibility state for each object and modify the check step for known patterns. Furthermore, we need also to maintain specific translation for each detected markers.
/* check for object visibility */
for( i = 0; i < objectnum; i++ ) {
    k = -1;
    for( j = 0; j < marker_num; j++ ) {
        if( object[i].id == marker_info[j].id ) {
            if( k == -1 ) k = j;
            else if( marker_info[k].cf < marker_info[j].cf ) k = j;
        }
    }

    if( k == -1 ) {
        object[i].visible = 0;
        continue;
    }

    object[i].visible = 1;
    arGetTransMat(&marker_info[k],
    object[i].marker_center, object[i].marker_width,
    object[i].trans);
}
So you have a visiblity flag associated with each marker, and a new transformation if the marker have been detected. For drawing your object you now call the draw function with the ObjectData_T structure in parameter and the number of objects:
/* draw the AR graphics */
draw( object, objectnum );
The draw function remains simple to understand: Traverse the list of object, if is visible use it position and draw it with the associated shape.
You can compile simplem and be sure that all necessary files are on the Data directory. The result is displayed figure 3.
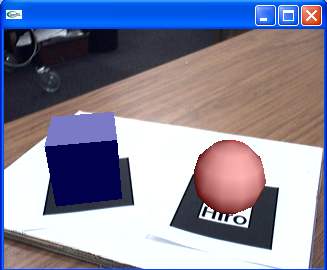
Figure 3: simplem Video Window
You can modify the object_data file and work with your own patterns!